
I consider myself pretty fearless in the baking department. Well, that it unless it is bread. Give me the most technically complicated French recipe and I will jump in with both feet. But bread? Nope. Even if it is one of my most favorite foods in the universe, bread terrifies me. Or I should say— it did.
I have been following Homesteading Family on Instagram and I have always been intrigued by their beautiful 5-Minute No Knead Bread. The beautiful artisan style bread had a crusty exterior and looked deliciously fluffy. Plus, I was intrigued that is baked in a Dutch oven. I bought all the equipment she recommended… back in the summer but did not try to make the bread until two weeks ago (that is how intimidating bread was for me. And y’all— I feel really silly that I did not try this before because it was easy and oh my goodness… so delicious! Plus, it is a basic dough that could be used for other baked goods, although I have not tried it other than for this artisan round.
This was my first loaf of bread using this recipe; and my first homemade loaf of bread ever.

Now, if you remember my tips from this cinnamon bread star, you really need almost the same tools to make the job easier.
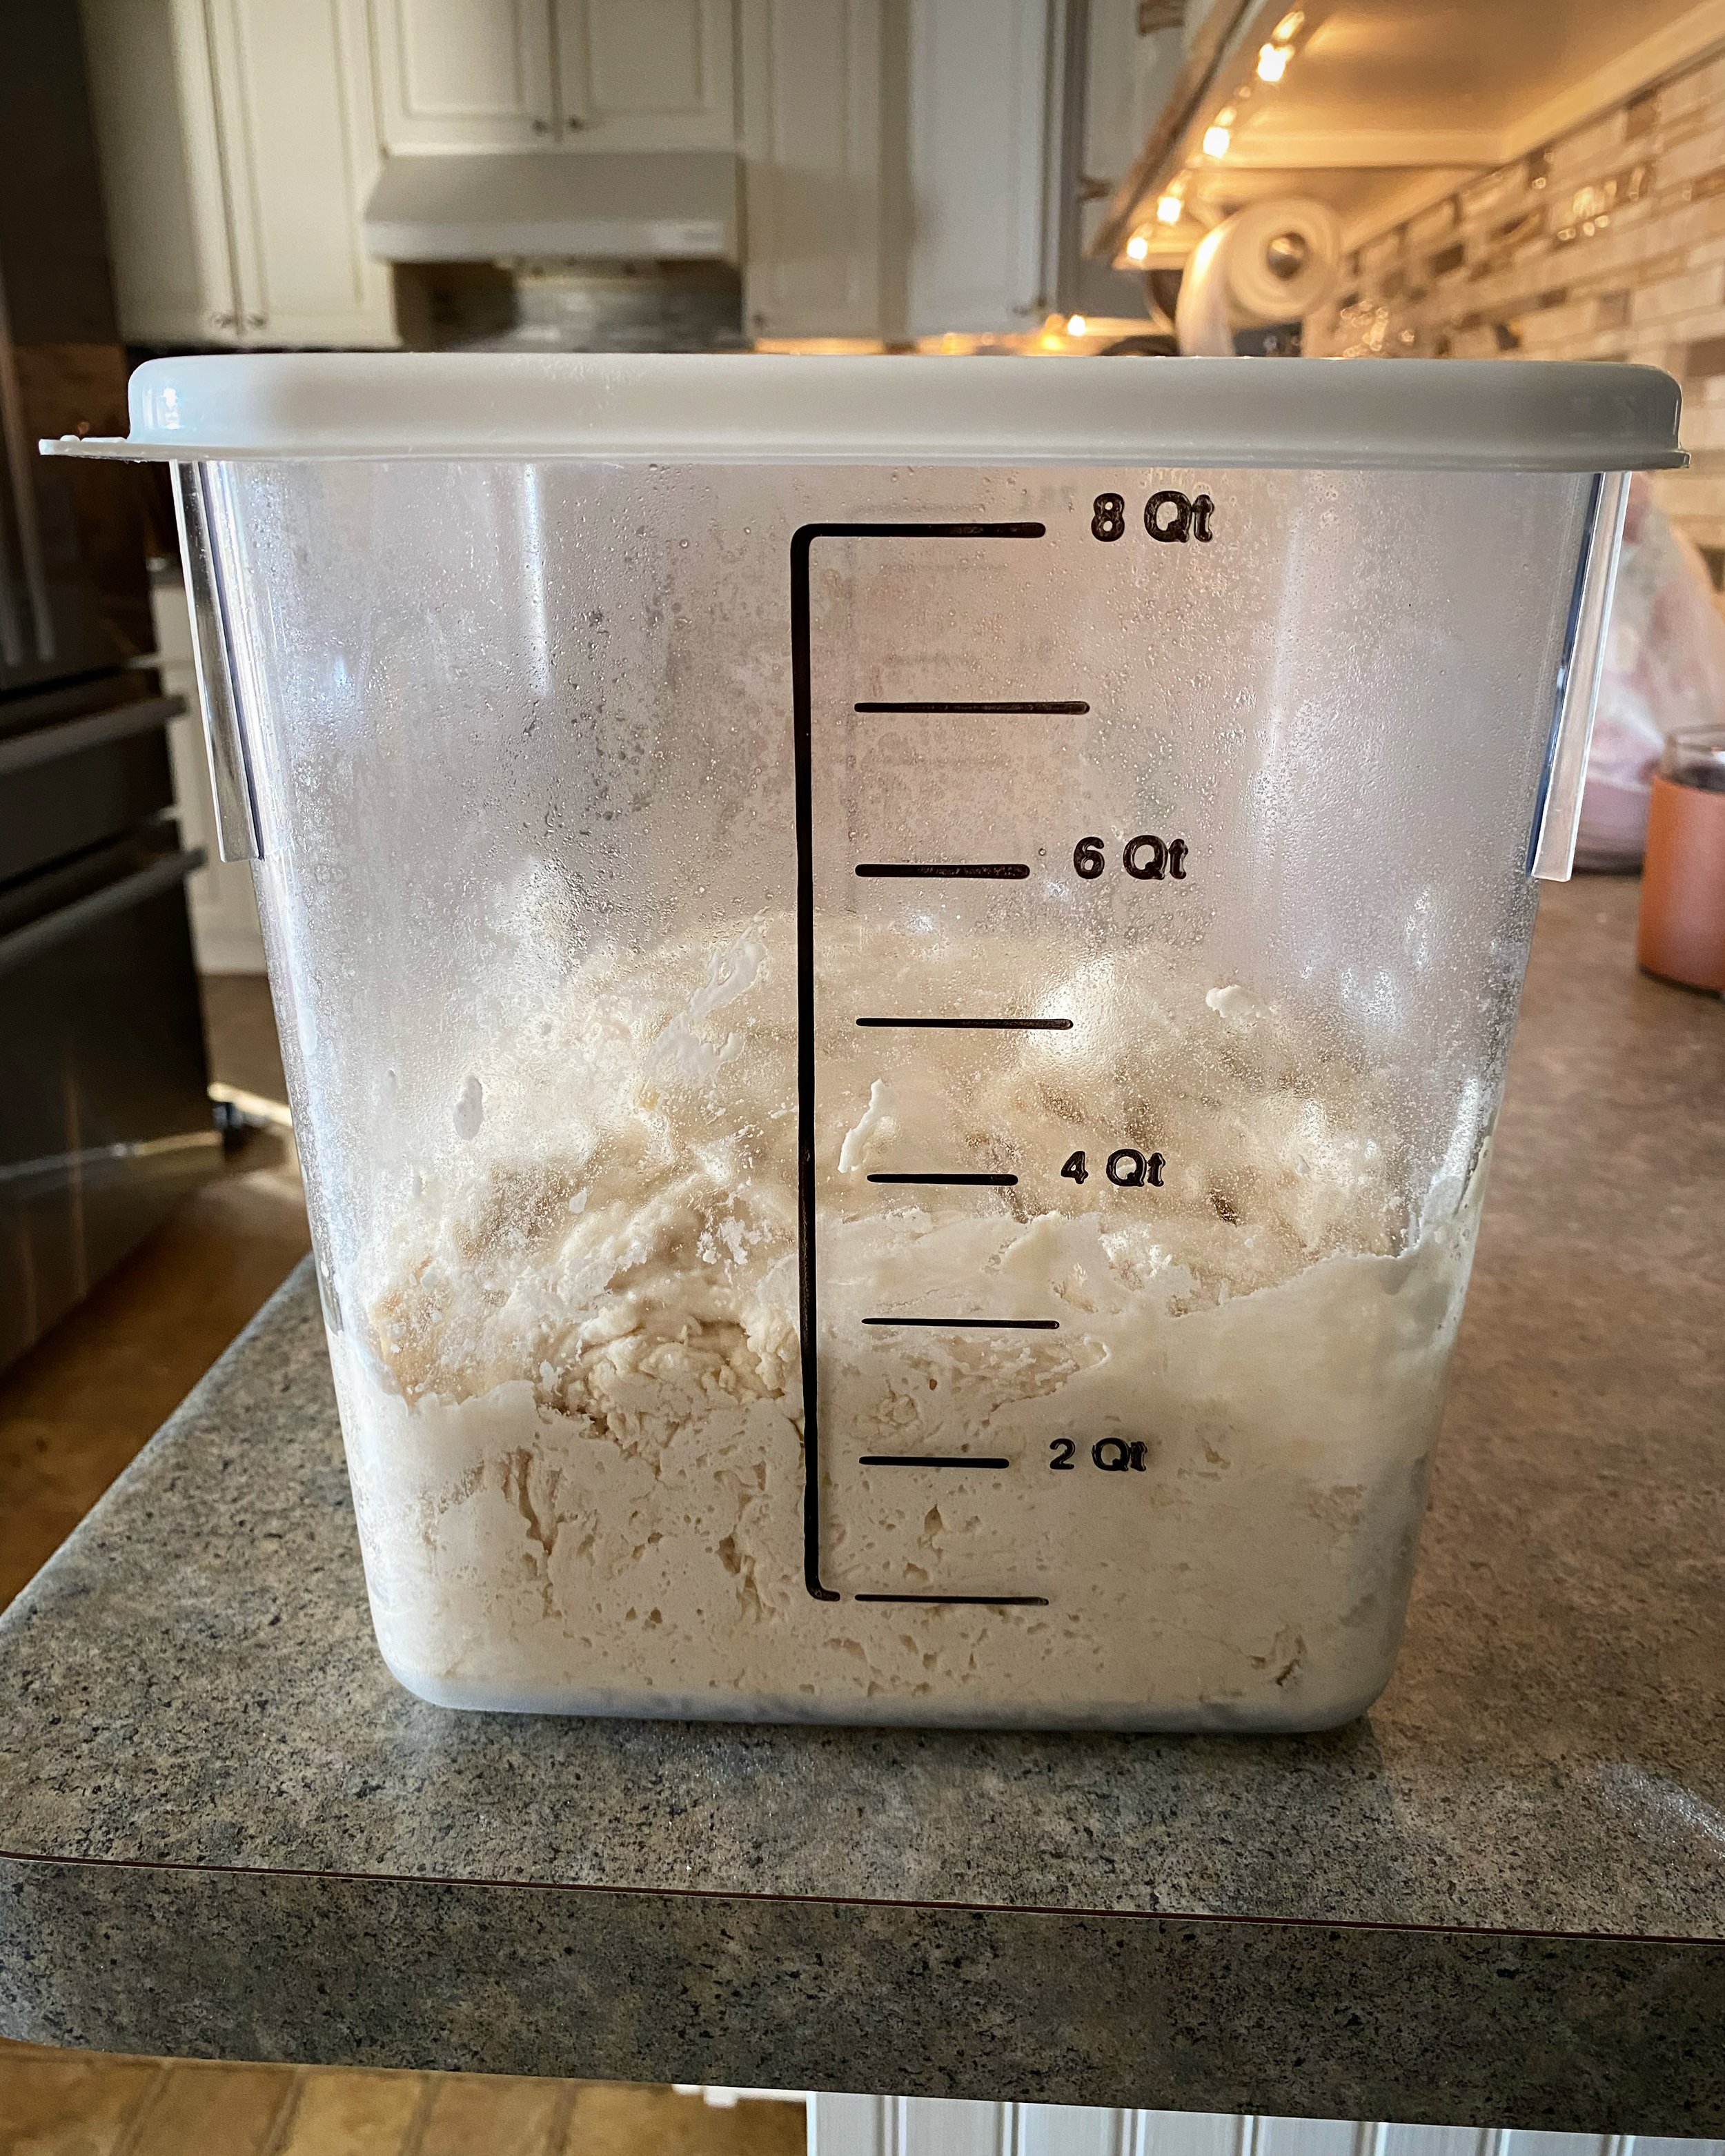
A large container – I love the Rubbermaid commercial food storage container. I have the 2-gallon, but also a 1-gallon that I move my dough into as I use it to save space in my refrigerator. I also got the lids (which are sold separately) because it is better than single-use cling wrap.
Danish dough whisk – While you can use a wooden spoon if you have to, I highly recommend investing in a Danish dough whisk. They make mixing the dough so much easier!
Banneton proofing basket— You can learn more about bannetons here
As I have gotten more comfortable with the recipe, I had made adaptations that work for us, and the more I make it, the more we eat it. The boys are the ultimate taste testers, and they love it! Below is the recipe from Homesteading Family, and I have bolded the things I have adapted.


Easy Artisan Farm Bread (adapted from Homesteading Family’s 5-Minute No Knead Bread)
Ingredients
3 cups water 100 degrees
2 Tbsp active dry yeast (for this recipe do not use instant yeast)
6 1/2 cups all-purpose flour
1 1/2 Tbsp sea salt (DO NOT SKIP THIS. I thought it was too much salt when I first made it, so I only used half the amount and ended up with a bread that was a bit bland.)
Instructions
For the dough
Add warm water to a large food-grade container. Add yeast and stir to combine.
Add flour and salt, stir with the Dutch dough whisk or with your hands until all ingredients are incorporated
Cover container with lid, or a piece of plastic wrap and a towel. Leave at room temperature for 2 hours (I move it to a space that is a bit warmer).
Transfer the dough to the refrigerator and let it rest until an hour and a half before you want a fresh loaf of bread.
** Note: this dough will keep in the refrigerator for a few weeks.
For the bread
Generously flour a banneton with rice flour and set aside. This is THE BEST tutorial in preparing your banneton, so the dough does not stick to it.
Remove a grapefruit-size section of dough from the refrigerator. Stretch the sides of the dough in on itself, folding it over and under to create a nice tight ball of dough. Pinch the sides together on the bottom and place, top-side down, into your prepared banneton.
** Note: Here is the one thing I do different— I knead the bread for about 1 minute to create some tension, and I find that it gives me a bread with a better crumb.
Cover with a towel and let rise for 40 minutes at room temperature.
20 minutes into the rise-time, preheat the oven to 425°F. Place dutch oven in the oven to preheat.
Gently flip your dough out of the banneton onto a sheet of parchment paper.
Carefully remove the hot Dutch oven from the oven, lift the parchment paper and gently lower the loaf with the parchment paper into the Dutch oven.
Cover with the lid and bake for 30 minutes. Remove lid and continue baking for 3-5 minutes until bread is golden brown on top. ** Note: I find that once I take the lid off, it takes about 5-10 minutes to get a beautiful golden color. But keep in mind that all ovens are different.
Remove from oven and carefully transfer bread to a cooling rack for a few minutes before slicing and enjoying.


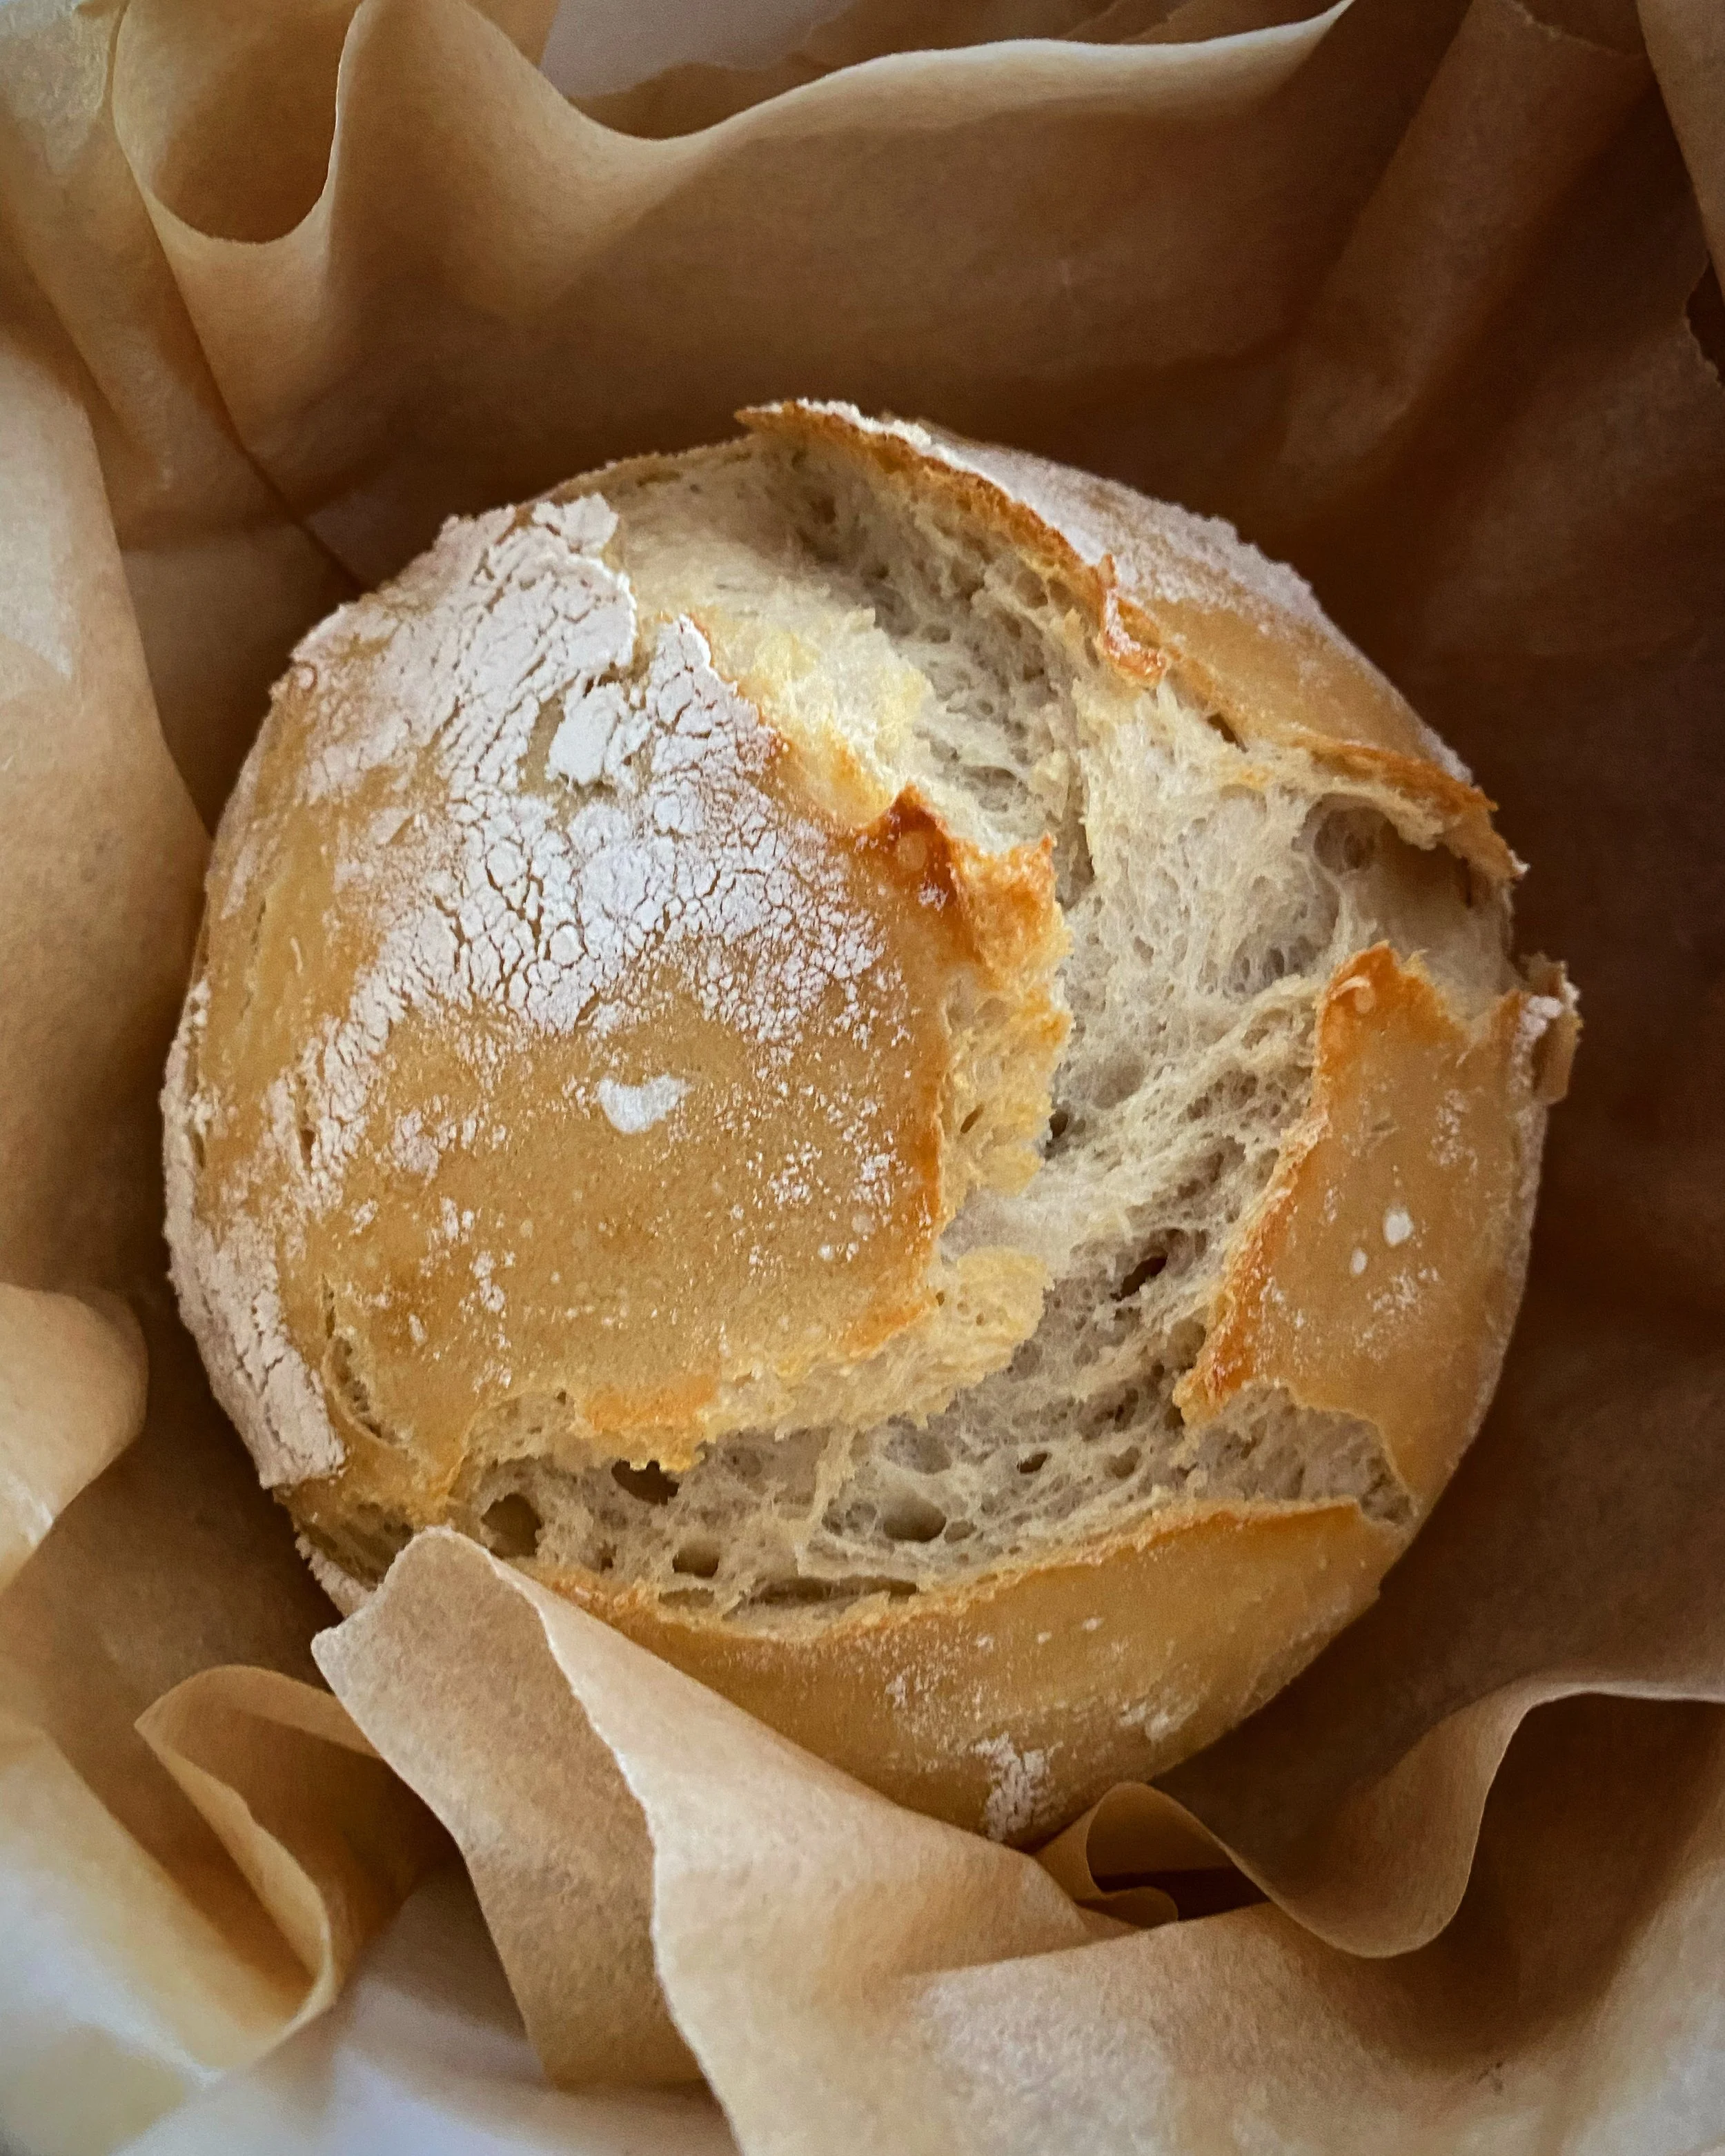
The result is a beautiful and delicious crusty bread, perfect to accompany any meal (my favorite is as a side for soups). If bread is something that you have never made, this is the recipe to try!
Here are other amazing link-ups I enjoy!
Mondays— Inspire Me Monday, Hearth & Soul, In a Vase on Monday, Mosaic Monday, All About Home Link Party
Tuesdays— Nature Notes, Tuesday Turn About
Wednesdays— Wonderful Wednesday, Soaring with Him, Wonderful Wednesday Blog-Hop
Thursdays— Imparting Grace, Heart Encouragement, Be Thee Inspired, Full Plate Thursday, Thursday Favorite Things, Runfessions
Friday— Floral Friday, Friendship Friday Grace & Truth, Farmhouse Friday, Floral Friday Fotos, Community - Five Minute Friday, Fabulous Friday Link Party, Encouraging Hearts & Home, Fabulous Friday
Saturday & Sunday— Pink Saturday, Saturdays Sparks Link Party, Garden Affair, Six on Saturday
Monthly— Garden Bloggers Bloom Day